
Powrtouch automatic motor mover guide
One of our most popular accessories, the Powrtouch automatic motor mover takes the stress out of manouevring your Go-Pod at home, on campsites or into/out of storage.
Particularly useful on difficult terrain (wet grass & gravel pitches) and for owners storing Go-Pods on driveways on an incline, this is the accessory that most owners wish they'd had installed when originally purchasing.
There are a few steps required to activate and engage your Powrtouch automatic motor mover that may not seem particularly intuitive at first, but once you've completed the process a few times, it will feel second nature.
1. Turn on the red power isolator switch
To get started, you'll need to locate and turn on the red power isolator switch to provide power to the motor mover unit.
This is located in the cupboard underneath the fridge on newer models. In older Go-Pods, it's located next to the battery box beneath one of the seats.
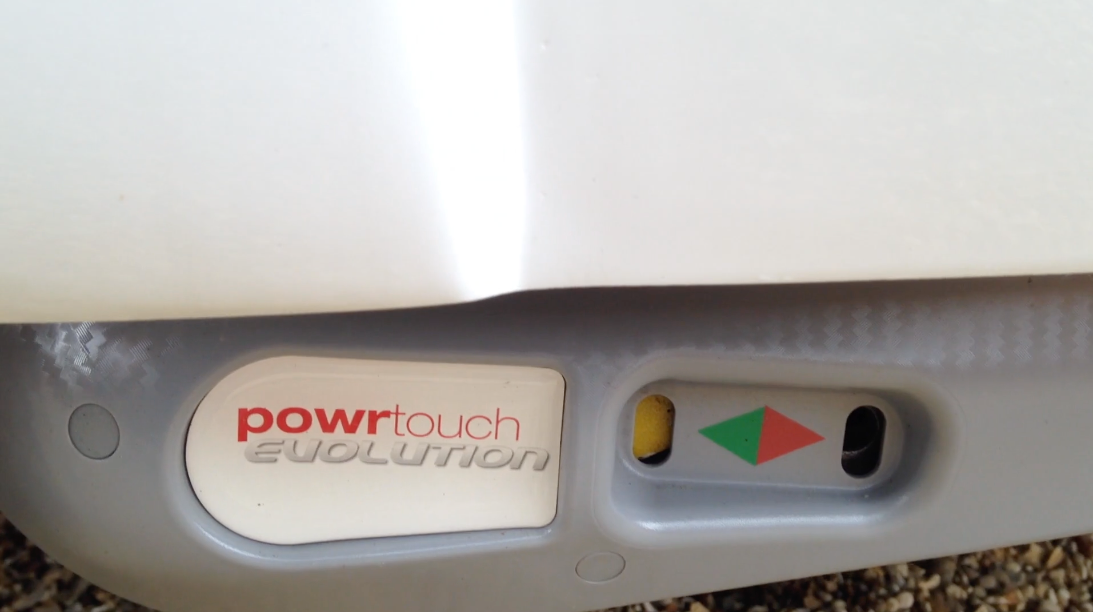
A green LED will illuminate on the motor mover controller box (blue on newer models, black on older Go-Pods) to indicate that the power supply is on. This is located under the right hand seat (facing inwards from the door).
2. Turn on the remote control
Grab your Powrtouch motor mover remote control for this step.
To turn the remote control on, press both green power buttons simultaneously, and hold them for 1-3 seconds. When the controller turns on, the green bar at the top of the control will illuminate.
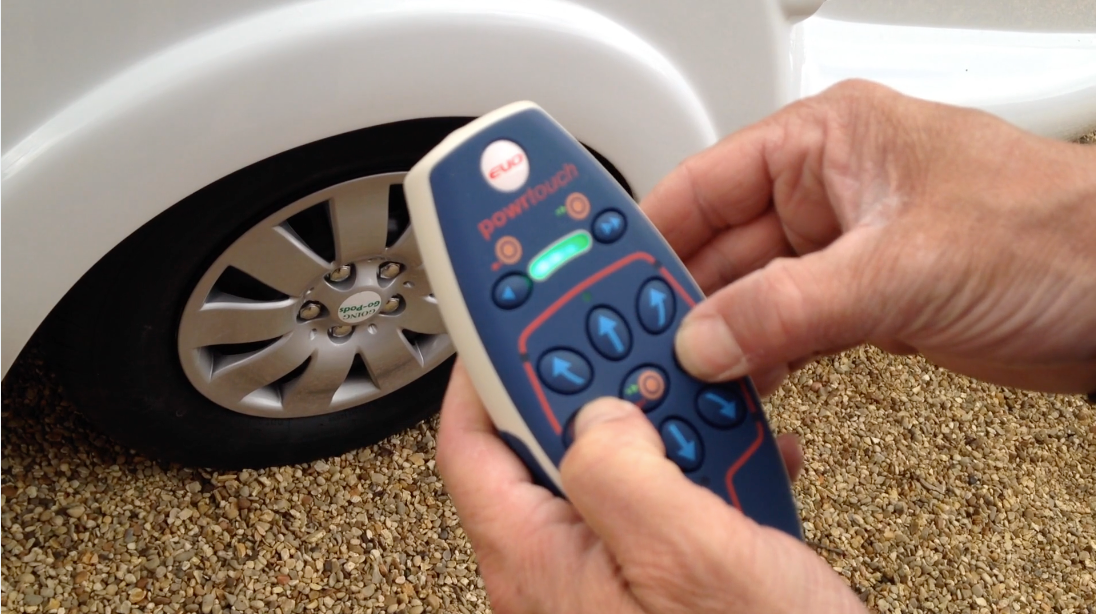
3. Engage the drive roller
Next you'll need to engage the drive roller (the cog shaped wheel slightly above of the motor mover unit that engages with the Go-Pod wheels).
To do this, press the center (engage/disengage) and top right (to the right of the green LED that illuminated on the controller in step 2) buttons simultaneously. Hold the buttons in for a few seconds.
You'll then see the driver roller start to slowly move from its position, until it is engaged with the Go-Pods wheels. When it is fully engaged, the small window next to the green arrow on the motor mover unit will be filled yellow.
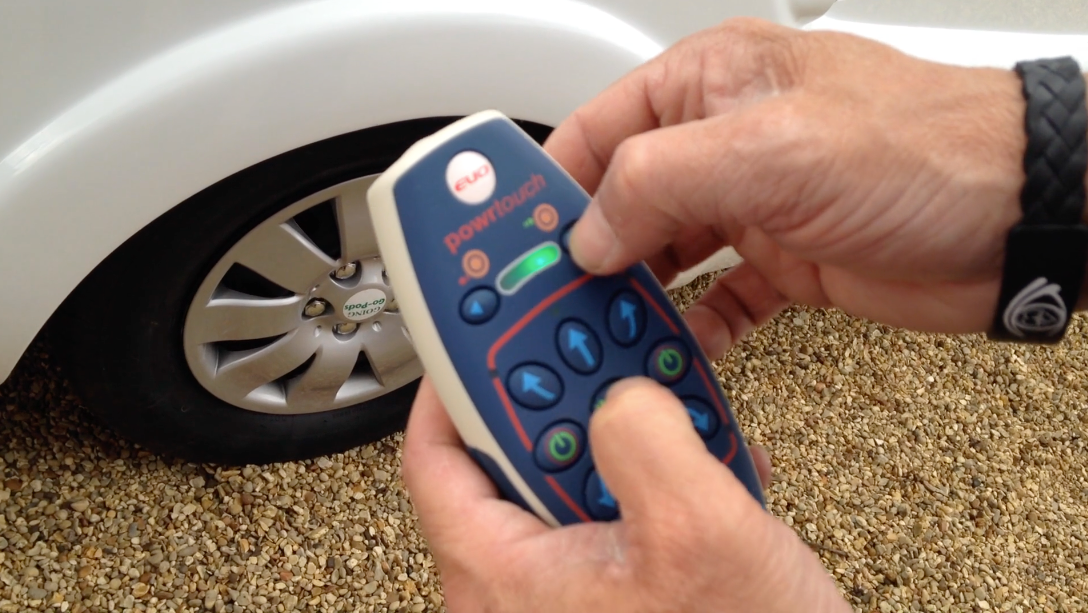
4. Move the Go-Pod
Now that the drive roller is engaged, you can move the Go-Pod using the motor mover unit.
This is done by pressing the directional buttons above and below the power and center engage buttons. The red outline around the buttons represents the shape of the caravan (looking down from above) and the point at the bottom represents the drawbar. This might take a while to wrap your head around!
It may be easier to turn the remote around in your hand when moving.
Forwards (straight)
To move the Go-Pod forwards in a straight line, you would press the 'down' arrow directly below the center engage/disengage button. This will activate the drive rollers on both sides to move the wheels in unison.

Right
To move it forwards to the right hand side, press the arrow button directly below the left hand power button. This will activate the drive roller on the left hand side of the Go-Pod forwards, and the right hand side drive roller in reverse.

Left
To move it forwards to the left hand side, press the arrow button directly below the right hand power button. This will activate the drive roller on the right hand side of the Go-Pod forwards, and the left hand side drive roller in reverse.
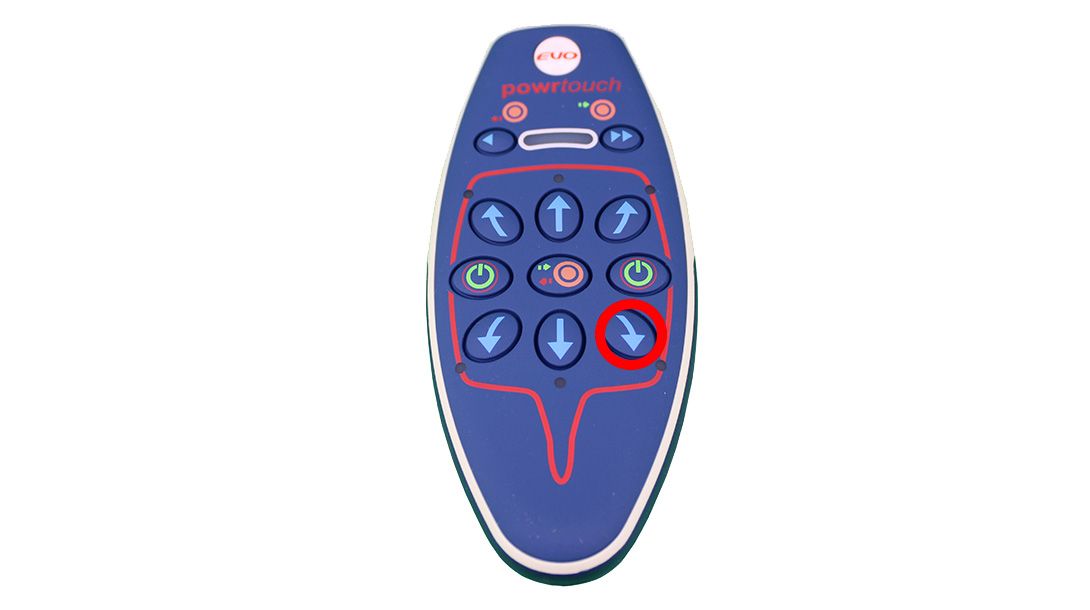
Reverse
Apply the same logic to the reverse buttons. You'll be an expert in no time!